Replace Screen Element Placeholders
The automation that is imported into Automation Studio completely automates the process that was selected in the Automation Portal. However, Automation Finder may not have been able to capture all screen elements; those missing screen elements will not be recreated automatically in Automation Studio. Instead, they are represented by placeholders. Placeholders are also created if Automation Studio was unable to retrieve screen elements from the server when importing the automation.
To complete the automation, you must capture the required screen elements and then use those to replace the placeholders.
Once you have replaced a placeholder with a screen element, every reference to the placeholder is automatically replaced by a reference to the selected screen element.
To replace a screen element placeholder:
-
In Automation Studio, capture the screen element needed to replace a placeholder.
-
Right-click the placeholder you want to replace.
-
Click Replace with.
-
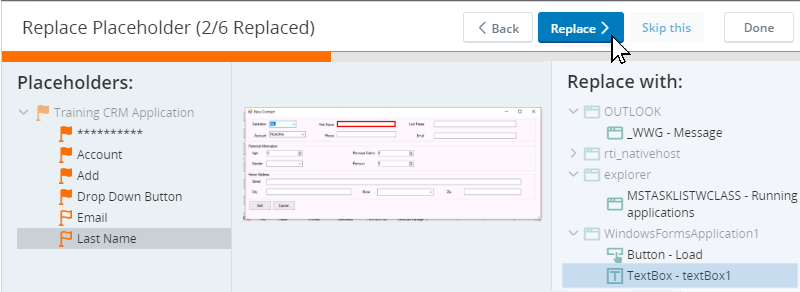
Select the screenshot to use to replace the placeholder from the Replace with list at the right side.
-
Click Replace.
-
Click Done.
The Replace Placeholder window closes. The replaced placeholder is no longer listed under Placeholders.
You can replace multiple placeholders before clicking Done. Use the Back, Replace, and Skip this buttons to navigate between the placeholders listed on the left, or simply click a placeholder to replace.
-
Save and test the project.


