

Project: Create and Use a Robotic Workflow
This scenario demonstrates how to create an automation solution that uses a robotic workflow.
For information about robotic workflows, see here.
Scenario Overview
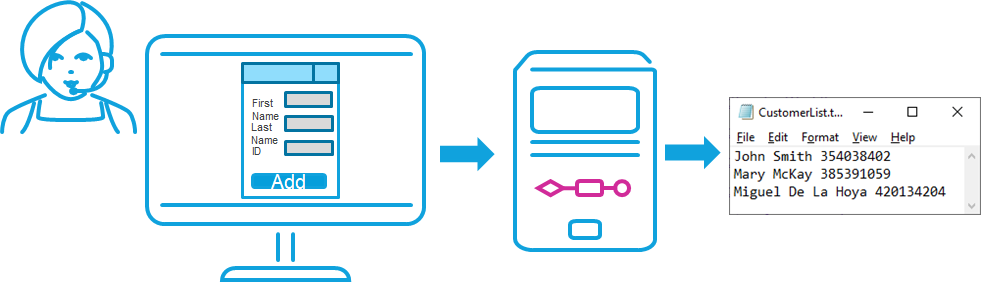
In this scenario, agents interact with an attended solution loaded on their machines. They enter new customer data into a callout. The callout then invokes a robotic workflow that runs on a robot machine and writes the customer data into a text file hosted on the robot machine.
Recommended Implementation Approach
This scenario follows the implementation steps below:
-
Set up the robotic workflow
-
Invoke the robotic workflow in the attended automation solution.
Set Up the Robotic Workflow
You must set up the robotic workflow before you can invoke it from the attended automation solution.
The recommended procedure is as follows:
-
Create a blank workflow.
-
Configure the workflow as a robotic workflow.
-
Specify the workflow's input parameters.
-
Add steps to the workflow.
-
Test the robotic workflow locally using a test workflow in the same project.
-
Upload the project to a Real-Time Server.
-
(For Admin) Assign the project to one or more groups of robot machines.
The procedure is demonstrated in the following video.
Invoke the Robotic Workflow from an Attended Automation Solution
Robotic workflows can be invoked from within attended automation solutions running on agents' machines.
The recommended procedure is as follows:
-
Add a reference to the project that includes the robotic workflow to add its Invoke method to the Assets Panel in the attended automation project.
-
Use the robotic workflow's Invoke method to invoke the robotic workflow from a workflow, callout, event handler, or user-defined function.
The procedure is demonstrated in the following video.