

Each step in a workflow represents a logical operation that the workflow must perform. The actual instructions to perform during the step are defined by the actions assigned to the step.
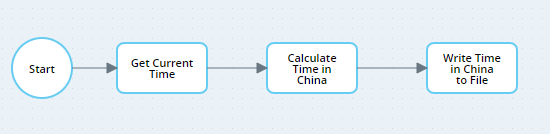
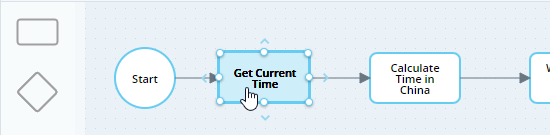
This workflow includes three steps. These are logical operations to be performed and are similar to the instructions you would give to a human to follow.
For a robot to understand how to perform each step, you must add actions to the steps.
Clicking on a step shows the actions assigned to it. The actions are located in the Builder area below the workflow canvas.
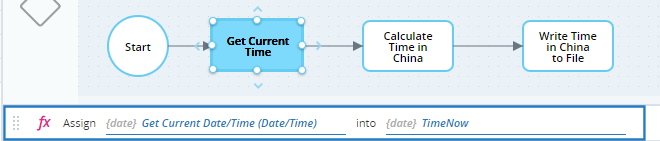
Any number of functions and methods can be added to one step.
To specify actions for a step, you need to:
-
Add functions and/or methods to the step by dragging them from the Assets Panel.
-
Specify the input parameters required by each of the functions and methods.
Add Functions and Methods to a Step
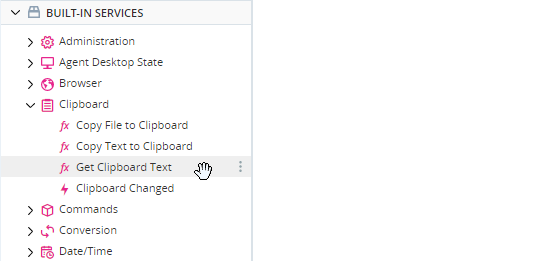
The functions and methods that can be added to a step are all listed in the Assets Panel. These include:
-
Functions in the Built-In Services, such as the Get Clipboard Text function which retrieves the text in the computer's clipboard.
-
Common statements, including the Assign, For-Each and If functions.
-
Methods of complex and list variables, such as the Add Item At End method used to add an element to the end of a list variable.


-
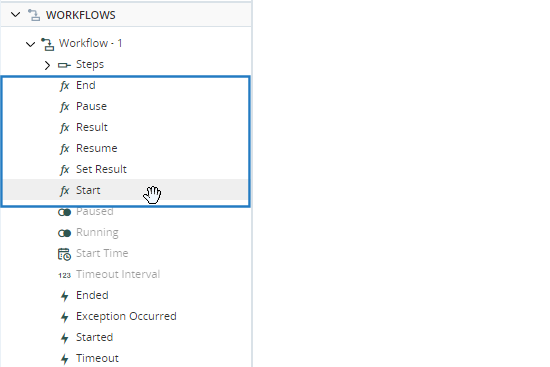
Methods of workflows, such as the Start method used to execute a workflow from another workflow.
 Show
Show
 .
.
-
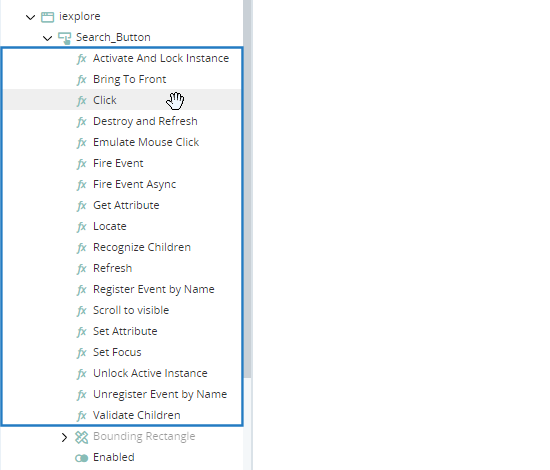
Methods of screen elements, such as the Click method used to click a button on a web page.
-
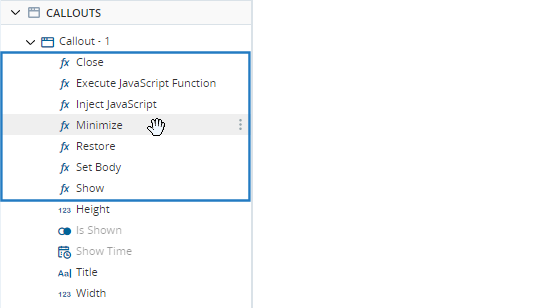
Methods of callouts, such as the Minimize method used to minimize the callout window.
To add a function or method to a step:
-
Click the step that you want to add actions to.
-
Drag the first function or method you want to add to the step into the Builder and release.
Specify Input Parameters
Many functions and methods include input parameters that must be specified.
In almost all cases, the hint text in the parameter indicates the type of value that is required.
For example:
-
The Delete Directory function has two parameters, the first requires a text input and the second requires a Boolean input.
-
The Convert Decimal to Text function requires one decimal input.


The Assign function does not specify the parameter type required. However, the second parameter you specify must be of the same type as the first specified.
There are many ways to specify a parameter:
-
Manually type text, a number, or a decimal into the parameter.
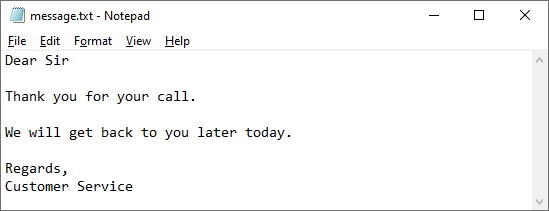
For text parameters, to enter longer texts and texts with line breaks, click the parameter and press Shift-Enter. A multi-line text area is then displayed. You can expand the text area to view more text.
Show
In the example below, multi-line text with line breaks is assigned to the text variable Message.
If the contents of that variable are written to a text file using the Write Text to File function, for example, the line breaks are maintained.
To remove the multi-line text, click the
 button.
 -
For Boolean parameters, choose True or False from the drop-down list.
-
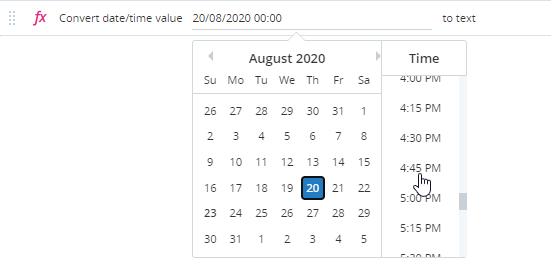
For Date/Time parameters, choose a date and time using the date picker.
-
Click the parameter and then click the Selector button
 to open the Selector window.
 For parameters that can only be specified by selecting from the Selector window, the Selector window is displayed as soon as you click the parameter.
The Selector window is displayed.
From the Selector window, you can choose to populate the parameter with:
-
A variable
-
A function or method, in which case the parameter is set to the output of the function or method
-
Empty Text
The Selector window only lists valid options for the selected parameter. For example, if you open the Selector window for a text parameter, it will only list:
-
Variables of type Text
-
Functions and methods whose outputs are of type Text
-
Complex variables that have at least one property of type Text. In this case, you will not be able to select the complex variable itself, you will only be able to expand it and select one of its Text properties.
-


Example
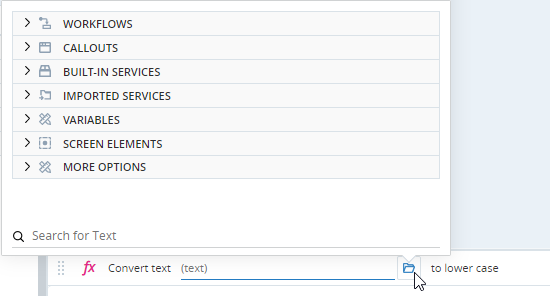
The example below shows how to set a parameter for the Assign function using the Selector window.
-
Click the second parameter and click the Selector button
to open the Selector window. -
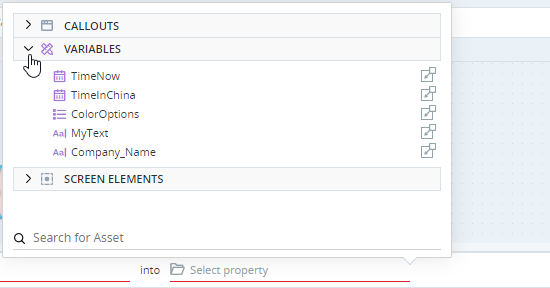
Open the Variables section.
-
Locate the TimeNow variable and click its Insert button
 to populate the parameter.
The second parameter is now set to the variable TimeNow.
-
The first parameter must now be of the same type as the second, namely Date/Time. Either choose a date and time from the date picker, or open the Selector window.


The full process is demonstrated in the GIF below.

Specify Temporary Lists
Many functions and methods include parameters that require that a list be specified. To populate such a parameter, you can either select a list variable or you can build the list directly as a temporary list.
To populate a parameter with a temporary list:
-
Click the parameter to open the Selector window.
-
Select Temporary List.
A placeholder for the first element of the temporary list is shown.
-
You can:
-
Type directly into the placeholder.
-
Click the
 button to open the Selector window to select a variable, a list, or any function or method that outputs a value of the required type.
If the placeholder is already populated with a variable, click the variable name to open the Selector window if you want to select a different variable or list instead.
-
Click the
 button to remove what you have entered in the placeholder.
 -
Click the
 button to add another item to the list.
 -
Click the
 button to remove a placeholder from the list.
-


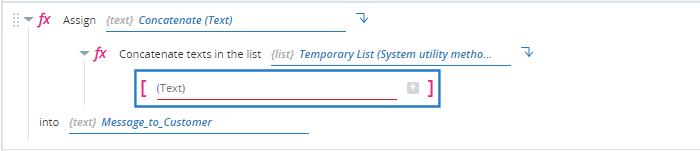


In the demonstration below, the Concatenate function is used to combine multiple text elements into a single text string.

Change the Order of Actions
To change the order in which actions will be performed, grab the action you want to move, drag it to the desired location, and release.
Delete an Action
-
Click the Delete button
 next to the action you want to delete.

Enable and Disable Actions
You can disable any action placed in the Builder. A disabled action is ignored during run-time and when debugging.
Errors in disabled actions, such as missing parameters, do not prevent your project from running and do not cause error indications on the project, workflow, or workflow step.
Disabled actions are displayed in gray, both in the Builder and in the Usage Reference panel.
If you disable an action that has sub-actions below it, as in the case of For-each loops, If blocks, and nested functions, those sub-actions are automatically disabled too.
To enable/disable an action:
-
Toggle the Enabled/Disabled button position.
Collapse and Expand Actions
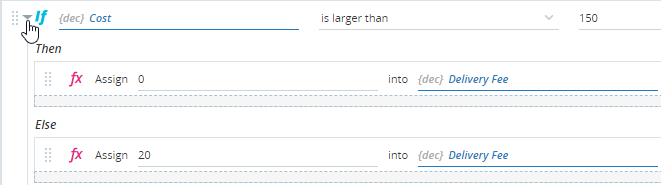
To simplify the display of actions in the Builder, you can collapse/expand the following:
-
Expanded

-
Collapsed

-
Expanded

-
Collapsed

-
Expanded
-
Collapsed

When you save your project, the current collapsed/expanded state of each action will be saved too.
Although you can collapse/expand actions while in Debug mode, you will not be able to save those changes until you make some other change to your project after exiting Debug mode.
Copy and Paste Actions
You can copy and paste actions within, and between the following assets:
- Steps
- Worklfows
- User-Defined Functions
- Transitions
- Triggers
- Callout control actions
- If statements
To copy an action, right-click the action > Copy.
To paste an action, right-click the action Builder > Paste.
Action Processing and Error Handling
When deciding on whether to group actions in a single step or to separate them between steps, it is useful to know how actions in steps are processed.
Processing Order
The actions in a single step are performed in order, from top to bottom.
Synchronous vs. Asynchronous Functions
Most functions in Automation Studio are synchronous, meaning that each action in a step will be allowed to run to completion before the next action in the step is run. Similarly, the last action in a step will be allowed to run to completion before the transition exiting the step is run. Functions and methods that are asynchronous are clearly labeled as such; an action following an asynchronous action will be allowed to start as soon as the asynchronous action has started.
Exception Handling
When an action throws an exception that is caught by Automation Studio:
-
No further actions in the same step will be performed.
-
The transition exiting the step will be run immediately, and the workflow will continue.
Best Practices
Note the following best practices:
-
Each step should have a single, clear purpose. The actions added to a step should achieve just one clear goal.
-
Note that if an action fails, all further actions on the same step are skipped and the transition exiting the step is run immediately.
-
Where action B is dependent on action A being completed, action B should be placed in a separate step.
-
When multiple actions are required to perform a single task in an external application, it is often advisable to group those actions in a single workflow step. Doing so makes it easier to use a single condition on the exiting transition to ensure that the desired outcome was achieved. It also makes retrying the sequence of actions easier to specify. This guideline applies in cases in which it is not necessary to wait for the application to respond between actions, for example, when populating multiple fields on a single form and clicking Submit.
-
Functions that invoke operations in external applications such as web sites, for example, Execute Script, may cause the workflow to hang as the external application may take time to respond. The workflow will not run the next action until a response is received.
It is thus preferable to use the asynchronous version of such functions where available, for example, Execute Script Async. Workflows do not wait for async functions to be completed before continuing to the next action.