

Edit an IBA Frame
When you capture an IBA element, the frame within which it is located is captured automatically. If another IBA element from the same frame has already been captured, the new IBA element will be listed together with the other IBA element below the same frame.
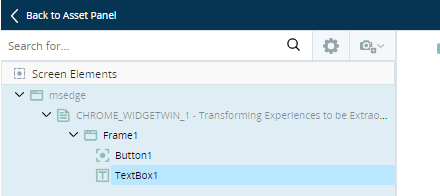
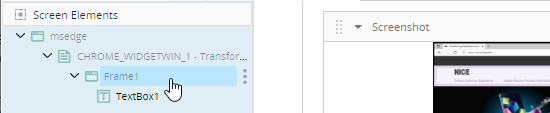
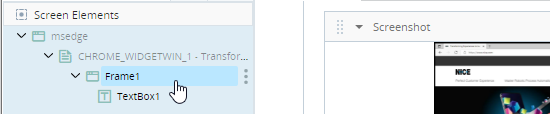
In the example below, Frame1 includes a button and a text box.
The Screen Elements tab allows you to specify how a frame should be treated and identified during run-time.

Open the Screen Elements Tab
The Screen Elements tab is displayed automatically after capturing an IBA element.
To open the Screen Elements tab at any other time, either:
-
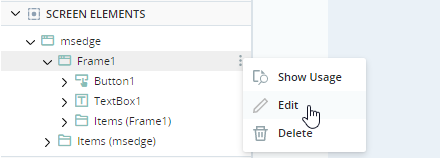
Hover over the frame you want to edit, click the Menu button
 , and click Edit.
 -
Click the Screen Elements tab below the Assets Panel.

View the Element Hierarchy
The Element Hierarchy is displayed at the left of the Screen Elements tab. The frame is listed above the IBA elements captured.
From the hierarchy, you can:
-
Click any element to view and edit its details.
-
Click the menu button
and then either delete the frame or open the Usage Reference Panel for a list of all places where the frame is used in the project.Deleting a frame deletes all the IBA elements it includes.

Name the IBA Frame
The captured IBA frame is assigned a name automatically.

You should change the name to a name you will be able to recognize in your project.

Set Availability as an Asset
By default, all frames you capture are listed in the Assets Panel and can be used as assets in the project. You can choose to prevent a frame from being listed in the Assets Panel and being treated as an asset in the project.
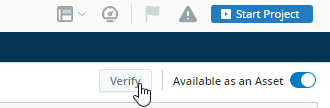
Whether a frame will be listed in the Assets Panel and can be used as an asset depends on the Available as an Asset setting.

When set to Off, the frame will not be listed in the Assets Panel and cannot be used as an asset. The frame will continue to be displayed in the hierarchy on the Screen Elements tab but will be displayed as disabled. IBA elements within the frame are not affected by their frame's Available as an Asset setting.
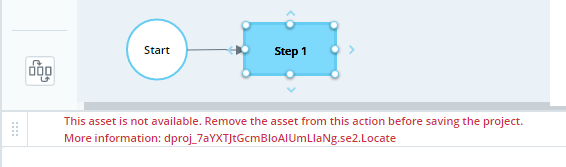
If the frame is already in use as an asset, Available as an Asset can still be turned off. However, this will result in an error wherever the asset is used.
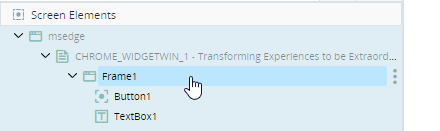
Frame 1 is initially available as an asset:
-
It is visible in the Assets Panel.

-
The frame is displayed as enabled in the hierarchy of the Screen Elements tab.
-
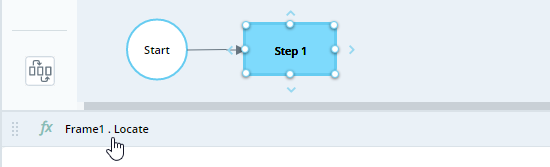
Its Locate method is in used in the project.
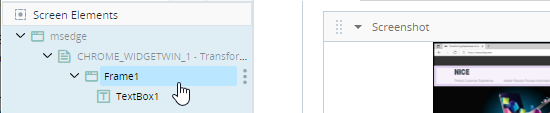
If Available as an Asset is turned off for Frame 1:
-
The frame is no longer listed in the Assets Panel. The IBA elements within the frame are displayed, however.

-
The frame is displayed as disabled in the hierarchy of the Screen Elements tab.
-
An error is shown wherever the frame was used in the project.
Test a Frame
You can check whether a captured frame can be correctly identified.
To test a frame:
-
Make sure that the application from which the screen element was captured is open, and that the frame is displayed.
-
Click Verify.
If the frame can be recognized, the relevant window is displayed and the selected element is highlighted. A success message is displayed:
If the frame cannot be recognized, for example, if the frame no longer exists or the anchors are not valid, a failure message is displayed:


Add an Anchor
Anchors are used to help identify the frame as well as the individual IBA elements captured in the frame. An anchor is captured automatically whenever an IBA capture is performed.
You can add additional anchors to a frame. Once captured, you can then use those anchors to define recognition properties for the IBA elements in the frame.
There is usually no need to add new anchors or to edit the anchors that were captured automatically.
To add an anchor to a frame:
-
In the Screen Elements tab, click the frame to which you want to add an anchor.
-
In the Anchors tab, click the Add Anchors button
 .
.-
Return to the application that contains the frame and click the element you want to capture as an anchor.
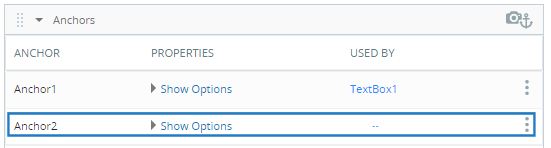
The anchor is captured and is listed in the Anchors tab.
The new anchor is indicated in the screenshot.
-


Edit an Anchor
You can edit an anchor that has been captured for a frame.
Any changes made to a frame's anchor will be applied to that anchor for all IBA elements within the frame. (If you make a change to an anchor's properties when editing a frame, those changes will be visible from the IBA element's editing screen too.)
The following options are available for anchors:
|
Option |
Description |
|---|---|
|
Shape Threshold |
Specify the recognition threshold for the anchor. If the anchor cannot be recognized, try adjusting this value downward. |
| Use Frame Identification | If not checked, the anchor is looked up at run-time but does not affect the frame identification - if the anchor is not found the frame is still identified. |
|
Rectangle |
The coordinates of the rectangle around the element are displayed in the following format: X-position of top-left corner, Y-position of top-left corner, width, height These values can only be modified for anchors and for IBA elements that are owner drawn (i.e., IBA elements that were not automatically surrounded by a blue rectangle during capture, for which the developer had to manually draw their outline). The anchor shown in the Screenshot panel is repositioned when you change the rectangle coordinates. These values cannot be modified for shape recognized elements (i.e., IBA elements that were automatically surrounded by a blue rectangle during capture). |
|
Shape Source |
(Read-Only) Indicates the source of the shape of the anchor:
|
View a Frame's Elements
All elements within a frame are listed in the Control panel. The controls that are bound to each element in the frame are listed.

Set a Frame's Options
The Options panel lists all options available for the frame.
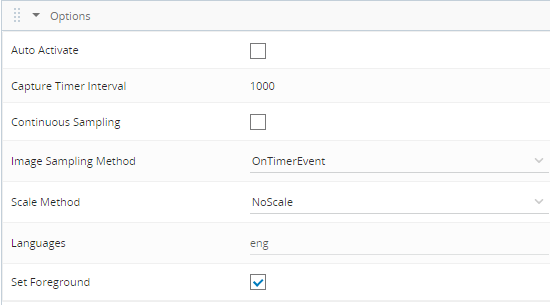
The table below explains each option:
|
Option |
Description |
|---|---|
| Auto Activate |
Automatically activates the frame when it is identified so that all captured controls inside the frame can be recognized. Choosing this option is recommended. If you do not choose this option, you will need to run the frame's Activate method to be able to interact with the controls inside the frame. |
| Auto Deactivate |
Automatically deactivates the frame when no longer needed. Choosing this option is recommended, as it helps to save CPU resources. If you do not choose this option, you will need to run the frame's Deactivate method. |
| Capture Timer Interval | Specify the interval at which the frame should be sampled. |
| Continuous Sampling |
Specify whether the frame should be sampled periodically to check for changes (True) or not (False). For performance reasons, do not set to True unnecessarily. |
| Image Sampling Method |
Specify when the frame should be sampled. OnTimerEvent: Sample the frame for changes at specified intervals, as specified by the Capture Timer Interval. OnImagesInterception: Sample the frame for image events at specified intervals, as specified by the Capture Timer Interval. If an image event is received, sample the frame for UI changes. Select this option when connecting to a remote application where the client is unaware of Windows paint events. OnWindowsEvent: Sample for Windows paint events at specified intervals, as specified by the Capture Timer Interval. |
| Scale Method |
If no match is found when attempting to identify an anchor in an image, a match might be found if either the image or anchor is downsized. Choose whether to attempt to downsize the anchor (ScaleAnchor), image (ScaleImage), anchor and image (ScaleAnchorAndImage), or neither (NoScale). Do not choose Anchor and Image unnecessarily as this option affects performance more than when downsizing only the anchor or image. |
| Languages |
Lists the language(s) set for the frame. When you capture an element, the language assigned to its frame depends on the Frame Language setting at the time the element was captured. |
| Set Foreground | Specify whether to set the frame to the foreground when the frame is activated (True) or whether to maintain its current position when activated (False), before capturing the image. |