Set Recognition Properties for Web Screen Elements
Automation Studio automatically chooses which recognition properties to use and sets their values appropriately when you capture a screen element from either Internet Explorer or any other supported browser.
However, to ensure that the screen element will be recognized reliably during run-time, you may need to modify the default recognition property settings. In some cases, it is possible to identify the need to modify the default settings immediately after the capture. In other cases, only after some testing will you realize that the default settings need to be modified for reliable recognition.
Preferred Recognition Properties
Automation Studio provides a list of recognition properties you can select. However, some recognition properties are more reliable than others.
The recommended recognition properties to use are listed below in descending order of preference:
-
ID
-
Selectors
-
XPath
Set the ID Recognition Property
The ID recognition property is the most preferred method of recognition.
Because web developers use IDs to name elements on the pages they build:
-
The ID of an element is likely to be unique on the page.
-
The ID of an element is unlikely to change over time.
-
The ID of an element remains unchanged even if the web developer moves the element to a different position on the page or makes other changes to the structure of the page.
Unfortunately, web developers do not assign IDs to all elements, so this option is not always available.
In this example, the input field has an ID.

Automation Studio by default assigned the ID recognition property to this screen element.

The ID of the element can be seen when using the browser's developer tools.

Set the Selector Recognition Property
If the ID recognition property cannot be used, you should try to use the selector recognition property instead.
What is a Selector?
The selector recognition property identifies the screen element by its location in the structure of the web page. If Automation Studio is unable to use the ID property, it will usually use the Selector property instead.
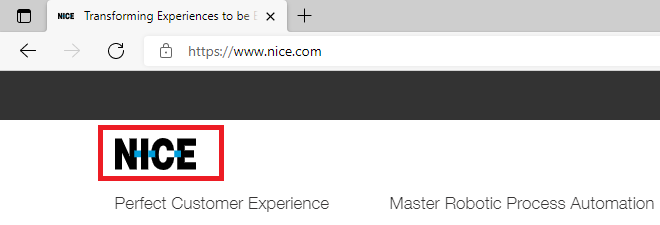
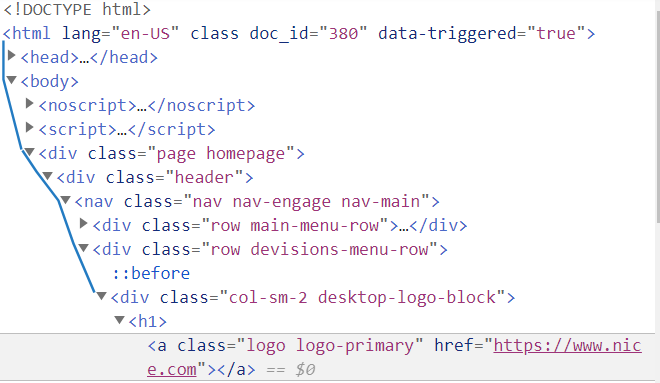
For example, if you try to capture the NICE logo at www.nice.com, the Selector property will be used.
The default selector is shown below:
html > body:nth-of-type(1) > div:nth-of-type(1) > div:nth-of-type(2) > nav:nth-of-type(1) > div:nth-of-type(1) > div:nth-of-type(1) > div:nth-of-type(1)
The selector specifies the path from the html tag at the top of the page, through the body tag, and past multiple div tags, to the captured element.
The selector recognition property is specified using CSS selectors.
A useful reference for CSS selectors is provided at https://www.w3schools.com.
Recommendations for Selectors
Tips for choosing effective selectors are listed below. Some examples of specifying selectors are provided.
-
Shorten the selector
As explained above, the default selector Automation Studio specifies maps the screen element from the top of the page. This results in a very long selector. If the web page developer makes any modification to the structure of the page along that path, recognition of the captured screen element may fail.
Best practice is to use selectors that are no longer than 3 elements long to reduce susceptibility to web page structure changes.
-
Generalize the selector
If the selector includes any data that is unlikely to remain constant, the selector should be modified to exclude that data.
In the example below, the selector includes what looks like a computer-generated code which may change over time.
Specifying Selectors
The examples below demonstrate how to build and test selectors.
All supported web browsers provide developer tools that are very useful when choosing selectors. For more information about using developer tools, see here.
A useful reference for CSS selectors is provided at https://www.w3schools.com.
This example demonstrates setting the selector for the search input field at www.nice.com.

-
Open the developer tools.
-
Activate the element selector
 .
. -
Select the search input field.

-
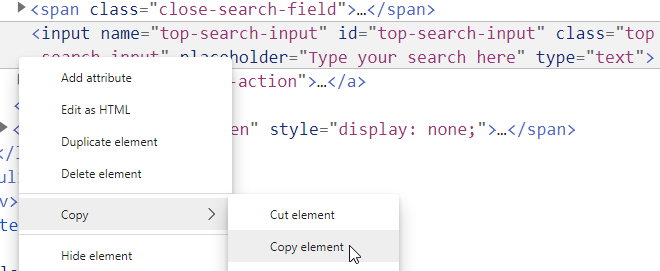
Right-click the highlighted line in the Elements tab and select to copy the element.
-
Paste the element into a text editor, for example, Notepad.

Note that this element has an ID (top-search-input), so the ID property could be used. For this example, we will ignore that.
-
Choose one attribute to use in the selector.
The element has multiple attributes, including name, class, placeholder, and text.
We will attempt to use only the type attribute.
The selector would then be:
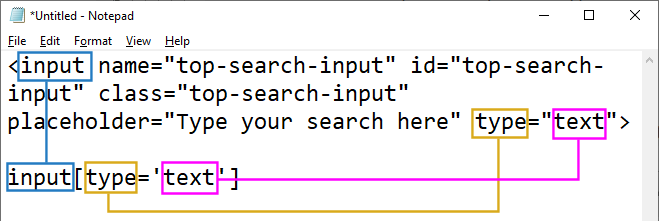
input[type='text']
The image below indicates how this selector is constructed from the copied element.
-
To test this selector using the browser developer tools, press Ctrl-F in the developer tools to open the Find bar.

-
Paste the selector to test.

Note that using this selector gives two results. That means that this selector does not identify the screen element uniquely in the page.
-
Modify the selector to use a different attribute, for example, the class attribute.
input[class='top-search-input']
The image below indicates how this selector is constructed.

-
Test the modified selector.

Note that only one match was found. This selector uniquely identifies the screen element. It is also short and does not include any codes that look like they may change.
-
Capture the screen element in Automation Studio.
-
Select only the Selector recognition property and paste the selector in the Value column.
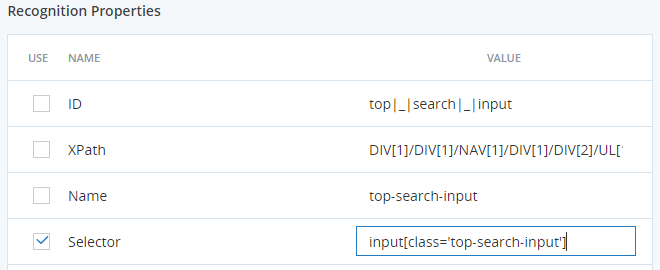
-
Click Locate.
The element is successfully located.

In Example 1, we were able to create a selector that identifies the element by a single attribute. In some cases, there may be no way to uniquely identify the element on its own.
This example demonstrates setting the selector for the Get In Touch button at www.nice.com.

-
Open the developer tools.
-
Activate the element selector
 ..
.. -
Select the Get in Touch button.
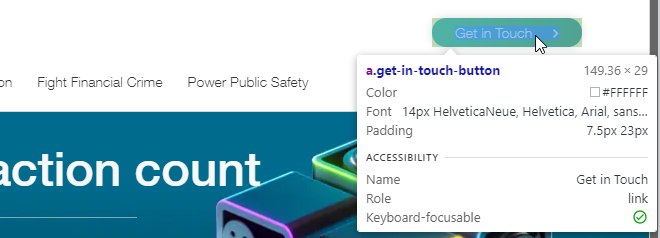
-
Right-click the highlighted line in the Elements tab and select to copy the element.
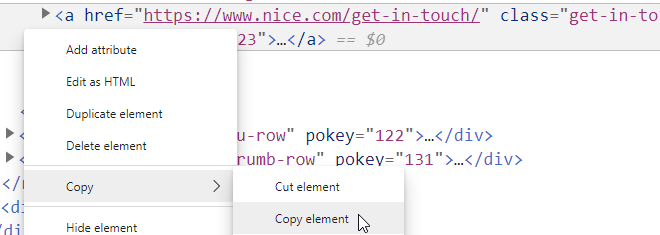
-
Paste the element into a text editor, for example, Notepad.

Note that this element does not have an ID that can be used.
-
Choose one attribute to use in the selector.
The element has a class attribute that may be suitable for use in a selector.
The selector would then be:
a[class='get-in-touch-button']
The image below indicates how this selector is constructed.
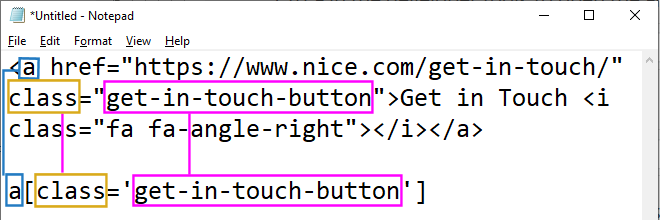
-
To test this selector using the browser developer tools, press Ctrl-F in the developer tools to open the Find bar.

-
Paste in the selector to test.

Note that using this selector gives two results. That means that this selector does not identify the screen element uniquely in the page.
-
We can attempt to modify the selector by anchoring to a higher-level element.
The element we want to capture (highlighted in gray below) is located within a div element. We can try to build a selector that includes information about the div element as well.

The div element itself has a class attribute with value col-sm-3 get-in-touch-block. The selector for that div element would be as follows:
div[class='col-sm-3 get-in-touch-block']
Combine the selector for the two screen elements using a > character.
div[class='col-sm-3 get-in-touch-block']>a[class='get-in-touch-button']>
-
To test the combined selector, paste it into the Find bar in the developer tools.

Now only 1 result is returned. The combined selector uniquely identifies the Get in Touch button screen element.
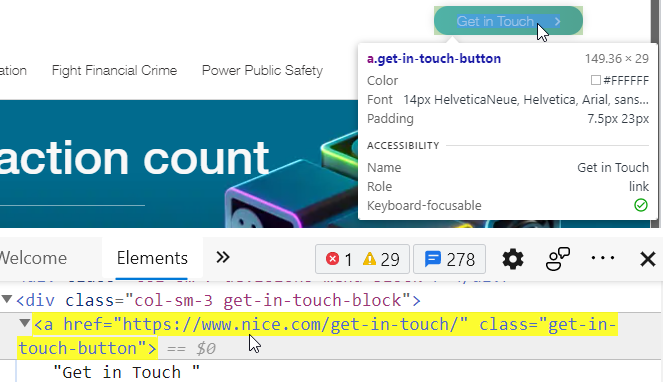
Example 2 demonstrated how to ensure that a selector uniquely identifies the required screen element by combing the selector for that element with the selector of an ancestor element.
This example demonstrates how the Multi Instance option can be used to assist with recognition of a screen element whose own selector cannot identify it uniquely.
This example demonstrates setting the selector for the Get In Touch button at www.nice.com.

-
Follow the same procedure as in Example 2 to build a selector based on the button's class attribute.
The selector is shown below.
a[class='get-in-touch-button']
The image below indicates how this selector is constructed.

-
To test this selector using the browser developer tools, press Ctrl-F in the developer tools to open the Find bar.

-
Paste in the selector to test.

Note that using this selector gives two results. That means that this selector does not identify the screen element uniquely in the page.
-
To see how Automation Studio handles a selector that matches multiple elements in a page, capture the screen element in Automation Studio.
-
In the Edit Screen Element screen, select only the Selector recognition property and replace the default value with the selector shown above.

-
Click Locate. The screen element cannot be located. This is because the web page includes multiple elements that match the recognition properties specified.

-
Select Has Multi Instances and choose First Recognized, for example, to recognize the first element on the page that matches the recognition properties.

-
Click Locate again. The screen element is identified successfully.

You should switch to the browser tab where the element is located to make sure that the correct instance of the element is being located.

This example demonstrates capturing the current temperature value from a weather site.

-
Open the developer tools.
-
Activate the element selector
 .
. -
Select the temperature value.
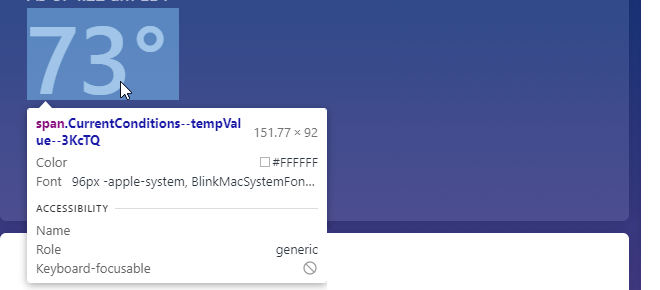
The element is selected in the developer tools panel.

The element has a class attribute that could be used to build a selector as below:
span[class='CurrentConditions--tempValue--3KcTQ']
Note though that the class value includes the text 3KcTQ. This text has no meaning and may be a computer-generated code that is likely to change frequently, for example, whenever the page is refreshed, after some time has passed, or for every new user. Including that text in the selector may result in recognition failure during run-time.
-
Build a selector that includes only the section of the class value that is unlikely to change.
span[class|=CurrentConditions--tempValue-]
This selector identifies elements that have a class attribute with a value that starts with the text CurrentConditions--tempValue.
-
To test the generalized selector, paste it into the Find bar in the developer tools.

Only 1 match is found. The code for the required element is highlighted.


