

Create and Format a Callout
You can create any number of callouts in your project.
Callout Types
A callout can be created in one of three modes:
-
Grid: In this mode, the location of controls on the callout is specified using standard HTML/CSS display properties. The 1 Column, 2 Column, and Table controls allow you to construct a grid in which to place other controls to achieve the desired layout. This is the default mode.
-
Freeform: In this mode, simply drag each control to the desired position on the callout. The 1 Column, 2 Column, and Table controls are not available in this mode.
-
HTML Callout: In this mode, you can use the HTML-based widget to build a callout using HTML, CSS, and JavaScript code. This will give the developers maximum control over callout appearance and behavior. For more information, see HTML Callout.
It is not possible to switch between Grid, Freeform, and HTML Callout modes once the callout has been created.
Manage Callouts
Instructions for managing callouts is the same as for managing all solution components.
Specifically, you can:
-
Note that, depending on the method used, you must choose whether to create a grid callout or a freeform callout.
Customize a Callout's Appearance
This section is applicable for Grid and Freeform callouts only.
Once a callout has been created, you can:
-
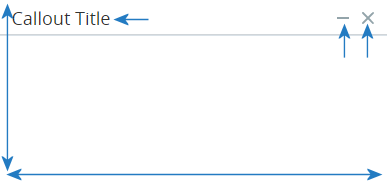
Change the title of the callout
-
Change its width and height
-
Hide or display the Minimize and Close buttons
-
Apply a skin to the callout
Automation Studio includes a selection of default skins. Additional skins can be added.
-
Specify where on the screen the callout should be displayed


To customize a callout's appearance:
-
Open the callout from the Assets Panel if not already open.
-
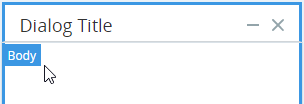
Ensure that the callout's body is selected: the border of the callout should be selected and rolling over the callout should display the Body label.
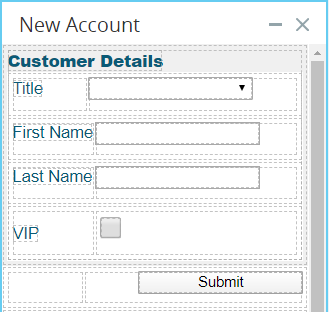
If any other component of the callout is selected, as shown below, click any open area of the callout to select its body.
-
Customize the appearance of the callout in the Style panel displayed at the right using the settings below:
Setting
Description
Name
The name of the callout (read-only). To change the name, see Create and Format a Callout
Title
The text to display in the title of the callout
Width
The width of the callout in pixels (minimum 140 pixels)
Height
The height of the callout in pixels (minimum 3 pixels)
Close
Whether to display the Close button
 in the callout
Minimize
Whether to display the Minimize button
 in the callout
Position Where the callout should be displayed on the screen Skin Select a skin to apply to the callout Background color The color of the background of the callout


Preview a Callout
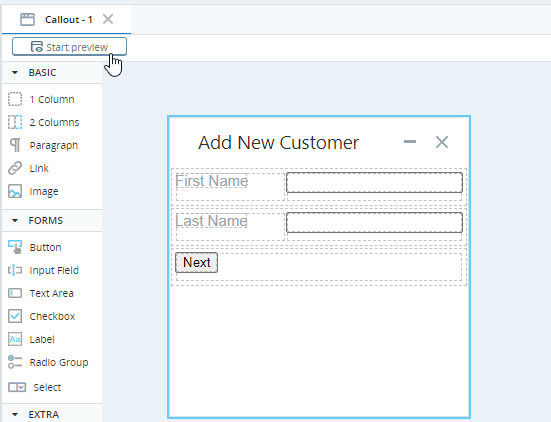
You can view of a preview of how your callout will appear to the agent when your automation solution is run.
The preview is based on the current state of your callout on the canvas. You do not have to save your project to preview your callout.
The callout opens on the screen at the position specified in the Style panel.

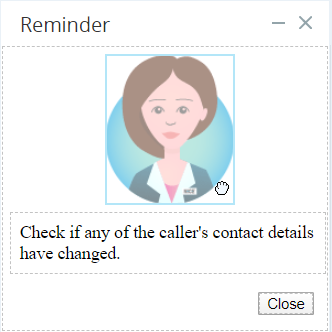
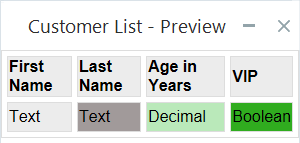
Note that dynamic tables do not display the contents of the selected data source in Preview mode. Instead, they display only a single row containing the types of the properties of the list type, as shown below.
To:
-
Launch a preview, click Start preview
-
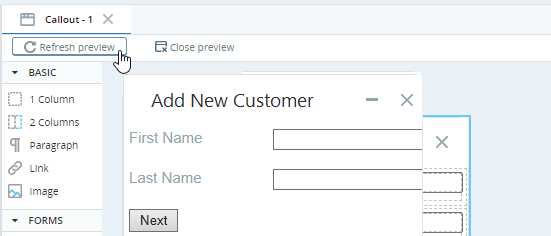
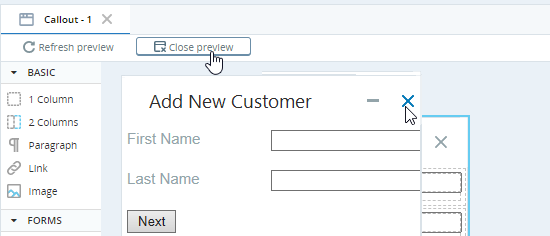
Update an open preview to reflect recent changes made to the callout on the canvas, click Refresh preview.
-
Close the callout, click Close preview or X on the preview itself if shown.

Duplicate a Callout
Duplicating a callout allows you to easily reuse the logic of an existing callout. The duplicate includes all the functionality of the original.
From the Assets Panel, on the callout, click Options > Duplicate
![]() .
.
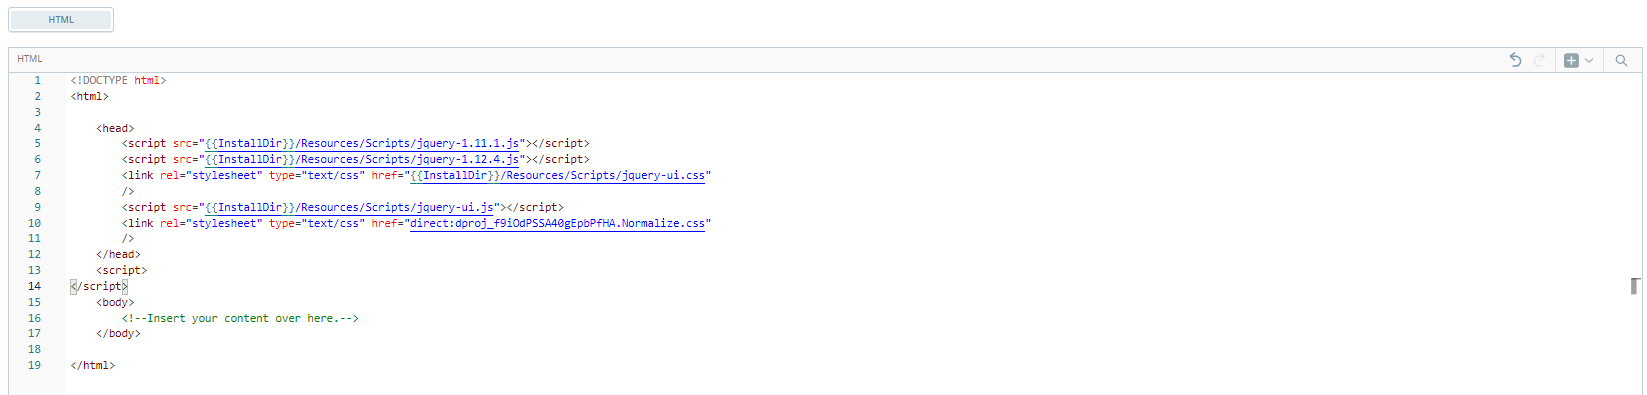
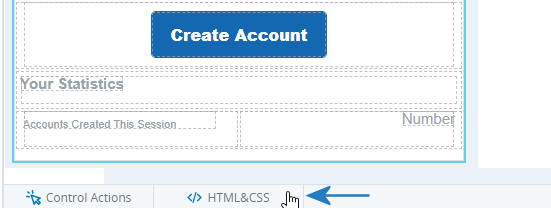
View the Callout's CSS and HTML
This section is applicable for Grid and Freeform callouts only.
You can view the complete CSS and HTML of the callout. The code is updated dynamically as you make changes to the callout and its controls.
The code is displayed on the HTML&CSS tab displayed below the callout.
The code is displayed with color-coding.
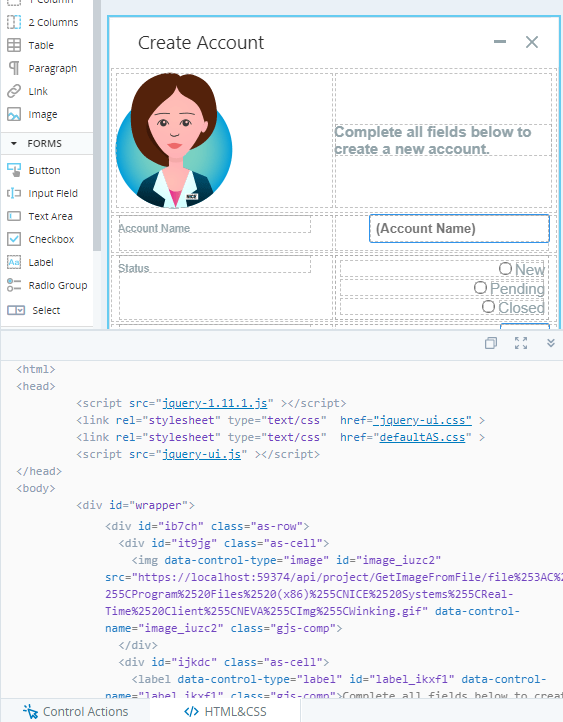
From this view, you can:
-
Close the HTML&CSS view.
-
Copy the HTML inside the <div id="wrapper"> tags for use in other applications.
-
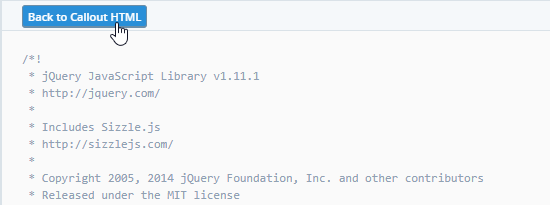
Click the links to CSS and JS files in the header:
The contents of the selected file are shown. Click the button to return to the callout HTML.


